Monday, October 18, 2010

Chicken Pot Pie 3 Ways

You remember them. Those individual chicken pot pies of yesteryear... frozen foil tins of something akin to thickened broth, skimpy bits of potatoes, nubs of carrot and, if you were lucky, even a few chunks of chicken, or at least chicken product. Not exactly an epicurean feast. Not even close. 

So, I ask you, what was the allure? Massive doses of MSG and convenience aside.  If presentation is everything, and it is, I'll hazard a guess. Avarice. Hungry people everywhere are attracted to the All-for-Me-entire pot-pie-in-miniature serving size. What kid (big or little) isn't? 

On that note, I give you Chicken Pot Pie Deluxe, both the individual and family-size versions, and the quick and easy variation- Deep-Dish Pot Pie, perfect for busy weeknight dinners. Try one. Try them all. Guaranteed to please the kid in you.


Deluxe Double-Crust Chicken Pot Pie

                                                                                                       © DJ Thorne, 2010 

Ingredients
  
  • 2 large potatoes, peeled, diced, parboiled
  • 1/4 cup butter
  • 1 medium onion, chopped
  • 2 carrots, diced or thinly sliced
  • 1 medium rib celery, sliced
  • 1 large clove garlic, minced
  • Salt & pepper
  • 1/4 cup flour
  • 2 cups -or 1 (14 oz.) can chicken broth
  • 1 chicken bouillon cube
  • 1/3 cup heavy cream or Half-and-half
  • 1 cup frozen peas
  • 2 cups cooked chicken, shredded
  • pastry for double-crust pie - or 1 pkg rolled pie crust- recommended: Pillsbury

 Instructions

  1. Preheat oven to 425° F.  Parboil potatoes in salted water until just tender. Drain and set aside.
  2. In large saucepan or deep skillet over medium heat, melt butter. Add onion, carrots and celery and, stirring occasionally, saute until tender crisp. Add minced garlic and cook 2 minutes more. Season with salt and pepper.
Saute vegetables until tender crisp

3. Reduce heat to medium low and add flour to vegetable mixture. Cook and stir 3-4 minutes or until smooth and bubbly.
Equal parts flour and butter make a roux


4. Increase heat to medium and gradually whisk in the chicken broth.  Add the bouillon cube and cream (or half-and-half) and stir to combine.
Whisk the broth & cream until smooth


 5.  Add the potatoes and frozen peas to the broth mixture. Gently stir in the chicken. Bring the  mixture to a gentle boil, reduce heat and simmer 4-5 minutes or until mixture thickens. Remove from heat and allow to cool.
6.  Meanwhile, prepare crust. (See video below for crust-making tips and instructions) Gently press bottom crust into  a 9-inch pie plate and gently prick pastry with a fork. Add the slightly cooled pie filling and top with second crust. Pinch to seal. Flute edges and, with sharp knife, cut 4 or 5 slits into top center to allow steam to escape. If desired, for a polished finish, brush crust with a thin wash of milk or beaten egg.
Brush crust with thin layer of egg wash to create a glossy finish

 7. Bake for 25 to 35 minutes or until crust is golden brown and filling is bubbly. Allow to cool 10 minutes before serving.


--------------------------------------------------------


Individual Chicken Pot Pies

You will need-
  • 1 large baking sheet, preheated
  • 6-8 oven-proof ramekins, custard bowls or miniature pie tins           
  • Pastry for double-crust pie
  • Recipe Deluxe Chicken Pot Pie (above)


Instructions
  1. Preheat baking sheet in oven set to 375° F.
  2. Follow above recipe through Step 5.
  3. Roll out pastry dough on a lightly-floured surface. Using an inverted ramekin or individual pie tin as a guide, with a sharp knife cut out rounds about 1-inch larger than bowl or tin diameter.
  4. Fill individual bowls/tins with the chicken mixture. Top each bowl with 1 round of pastry dough. Pinch along edges of bowl to seal and flute or crimp as desired (see above video for tips). With sharp knife, cut several slits in center of crust to allow steam to escape. If desired, brush crust tops with a thin layer of beaten egg.
  5. Bake until crusts are golden brown and filling is bubbly, about 35 minutes.


Yield: 6-8 individual pot pies, depending on bowl size

----------------------------------------------------------------


Quick & Easy Deep-Dish Chicken Pot Pie


Ingredients
  • 1 roll refrigerated pie crust (Pillsbury or generic, in dairy case)
  • 2 (10.5 oz) cans reduced-fat condensed cream of chicken soup
  • 1/4 cup milk
  • 1 (4 oz) can mushroom stems & pieces, reserve liquid
  • 1 (16 oz) bag frozen mixed vegetables
  • 2 cups cooked chicken, shredded or cubed
  • 1/2 tsp dried thyme
  • 1/4 tsp black pepper

Instructions

  1. Preheat oven to 400° F.
  2. In large bowl, whisk together the soup (do not add water), milk and the reserved mushroom liquid. Add the mixed vegetables, mushrooms, chicken, thyme and pepper and stir to combine. Pour mixture into a 2-quart casserole dish.
  3. Unroll the pastry crust over chicken mixture in casserole dish. Turn edges of crust under and pinch to seal. With sharp knife, cut 4-5 slits in center of crust. If desired, brush with beaten egg. Bake  until crust is golden brown and filling is bubbly, about 40 minutes. Cool 15 minutes before serving.
Yield: 6 Servings


FYI LINKS
Classic Crisco Pie Crust Recipe


Thursday, October 14, 2010

Eggs Benedict

Eggs Benedict. Can you believe it? After a  five-decade [gulp] love affair with food,  it was only recently that I encountered and fell in love with this ridiculously luscious and insanely decadent dish. I know what you're thinking and, no. This was not an intentional exercise in self-denial, nor an effectual attempt at avoiding the practice of culinary hedonism. (Believe me, had I known what I was missing, I might have named my first-born "Hollandaise." Seriously. That's how much I love the stuff.) No, this was merely a case of ignorance, pure and simple. Ignorance and maybe intimidation.

For one thing, the dish just sounds-- excuse me-- hoity-toity.  I mean, "Hollandaise sauce, dahhling...." Gourmet to the extreme. And complicated. Well the latter is both true and false. Food experts claim that this, the diva of sauces, can be a bit, shall we say, temperamental. If handled haphazardly, the butter and egg yolk mixture has been known to curdle. But I can assure you that curdling is an easily-avoidable and effortlessly-correctable pitfall, one well worth overcoming.


Hollandaise-- the Diva of  French Sauces
(Photo by DJ Thorne)


Still not convinced? Okay then. Think about this. What enlightened kitchen wizard doesn't need an arsenal of creamy sauces to combat the war cries certain to arise on leftover Wednesday? And besides, hollandaise is unbelievably versatile. Drizzle this thick, buttery wonder over eggs, toast, broccoli, asparagus, Brussle sprouts, pasta, fish, in casseroles..... Endless possibilities.

I swear, you can do it. And you will love it.


EGGS BENEDICT MY WAY

(Photo by DJ Thorne)


For Eggs Benedict (4 servings) you will need:
  • 4 eggs, poached (recipe follows)
  • 2 English muffins, split and toasted
  • 8 strips bacon, cooked
  • Hollandaise Sauce (recipe follows)

Poached Eggs

Ingredients
  • 4 Tbsp white vinegar
  • 1 tsp salt
  • 4 eggs


Method 1 Directions
  1. Lightly grease 4 custard cups or heat-resistant ramekins and set the cups into a large saucepan or Dutch oven. Fill with enough water to just cover the cups. Add vinegar and salt. Cover and bring to a boil. Once water boils, lower heat until water remains at a steady simmer (little bubbles should barely break the surface of the water).
  2.  Into a measuring cup, beak one egg and, holding the cup as close to the simmering water as possible,  slide egg into the custard cup. Repeat with remaining eggs. Simmer, uncovered, for 4-5 minutes or until whites are set and the yolks just begin to thicken. Remove cups and, with a spoon, carefully slide each egg onto a prepared muffin.
    Poaching Eggs in Custard Cups
    (photo by DJ Thorne)

Method 2 Directions
  1. Grease the bottom of a deep skillet, large saucepan or Dutch oven. Add 3-inches of water and bring to a boil. Reduce heat just enough to maintain a strong simmer (as directed above). One at a time, break egg into a measuring cup and gently slide into simmering water. Simmer about 5 minutes or until egg whites are set and yolk begins to congeal. Remove eggs with slotted spoon and place on top of muffin half.
    Hold Cup Close to Water and Gently Slide Egg into Simmering Water
     (photo by DJ Thorne)


Hollandaise Sauce

Ingredients
  • 1/2 cup (1 stick) butter, at room temperature, cut into 1 tablespoon pieces
  • 3 large egg yolks, well beaten
  • 1 Tbsp lemon juice (2 if you love lemon)
  •  1 Tbsp water
  • Salt & pepper, to taste
Vigorously Whisk Hollandaise and Add Butter Slowly to Prevent Curdling
(photo by DJ Thorne)


Directions
  1. In the bottom of a double boiler or medium saucepan, bring water to a boil. Reduce heat enough to maintain a gentle boil.
  2. In heat-proof bowl or top of double boiler,  whisk together the egg yolks and water. Place the bowl or top boiler over the boiling water (do not allow water to touch the bowl). 
  3. Add one pat of butter at a time into the egg mixture, whisking rapidly, until melted. Repeat until half of the butter has melted and is incorporated. Whisk in 1 tablespoon of lemon juice. At this point, sauce may appear  to be curdling but will smooth out as remaining butter is incorporated. Continue whisking in butter one pat at a time, about every 30 seconds. If using, add remaining tablespoon of lemon juice. Whisking rapidly, cook an additional 2 minutes or until sauce emulsifies.
  4. Remove from heat. If sauce does curdle, fear not. In the double boiler over low heat, whisk in 1 or 2 tablespoons of hot water or 1 egg yolk and stir until smooth and thickened. Season with salt and pepper. Serve immediately or place in warmed thermos. To reheat, warm in microwave for approximately 20 seconds or over low heat for approximately 45 seconds.


To Assemble

Place two halved strips of bacon on top of each split English muffin. Top each with a poached egg. Drizzle about 2 tablespoons of Hollandaise sauce over egg and serve immediately.
Enjoy.


Notes

- Vinegar helps to "seal" the eggs as they cook, preventing them from falling apart in the water.

- Please don't hurry when adding the butter. It's important to only add and melt one pat at a time. This helps
   to prevent curdling.

- It is important to use fresh eggs when poaching, as the whites of older eggs tend to break apart in the water.

- Note, this is Eggs Benedict My Way. For authentic eggs Benedict, substitute 4 slices of Canadian bacon
   for the bacon strips.

- Okay, if you're still not sure you want to attempt your own Hollandaise sauce, there is another option.
   Knorr, for instance, makes a Hollandaise sauce mix. Look for it in the gravy mix aisle of your supermarket.

-  Because Hollandaise sauce contains eggs, do not keep warm for more than 2 hours. Refrigerate and reheat
    for later use to be safe.

-  In this recipe you will end up with 3 eggs-worth of egg white. You can refrigerate these in an an airtight          container for 7-10 days, or freeze for up to a month. Or, for a low(er)-cholesterol version of eggs Ben-
    edict, separate egg yoks from whites, and poach the egg whites only.

- To test for freshness, place egg in a deep cup filled with water. If the egg sinks, it is fresh.  Likewise, if
   the egg floats, it is not fresh and should be discarded. 


 FYI LINKS

Poaching, Simmering, Boiling
What is the French Paradox?
Sauces in French Cuisine


    Tuesday, October 12, 2010

    Crock-Pot® Kalops

    "Kalops?" you ask. "What the heck are 'kalops'?" Don't let the odd name dissuade you. Kalops is a simple Swedish dish consisting of stew beef braised* in gravy with onions and, if desired, a handful of root vegetables. I call it "the poor man's beef bourguignon." 

    Simply put, kalops is to Sweden what beef stew is to America. The ultimate comfort food.


    KALOPS
    Swedish Beef & Gravy


    INGREDIENTS

    • 2 lbs. stew beef or chuck roast cut into cubes
    • 2 Tbsp olive oil
    • 1/2 cup red wine (or water) for deglazing *
    • 1 medium onion, chopped
    • 1 clove garlic, peeled
    • 2 cups water or beef broth (reserve 1/4 cup)
    • 2 bay leaves
    • 2 tsp Kosher salt
    • 1/4 tsp black pepper
    • Optional - for authenticity - 1/8 to1/4 tsp allspice, depending on taste
    • 2 Tbsp cornstarch

    DIRECTIONS

    Note: Step 1 is optional. Meat can be placed directly into slow cooker. However, browning the beef definitely intensifies the flavor.)
    1. Preheat the slow-cooker to high setting; low setting if you plan to simmer longer than 8 hours. In large skillet, heat oil over medium-high heat. Add the beef cubes and cook until browned on all sides. (If you like, you can also saute the onions until translucent, but this is optional.) Introduce meat to slow cooker. In same skillet, add the wine or water, if using, and return to heat. Bring to a bubble, stirring and scraping brown bits from the bottom of the pan. Cook and stir 1 minute more then add the juices to meat in slow cooker.
    2. To the slow-cooker, add beef broth or water, if using, reserving 1/4 cup. Add remaining ingredients except for cornstarch and reserved broth. Stir to combine. Cover and cook on high 6-8 hours, low 7-10 hours.
    3. One to two hours before serving, whisk the cornstarch into the reserved broth (or water) until blended. Add to stew mixture and stir to combine. Cover and continue to cook until gravy is thick and bubbly. Before serving, remove bay leaves and garlic clove.

    Serve over mashed potatoes, rice, egg noodles or hot biscuits.


                                                                                                                               Serves 4-6                       
    Smaklig måltid! 
    French Translation: Bon appetit!)


    Don't own a slow-cooker?  
    That's fine. You can prepare Kalops just as easily in a Dutch oven. Follow instructions above, except simmer, covered, until meat is tender and cooked through about 1 1/2 hours. Add cornstarch and reserved beef broth mixture as directed, cook and stir 10 minutes or until gravy has thickened.


    NEW CULINARY TERMS
      - Braising (from the French `braiser`) is cooking with `moist heat`, typically in a covered pot with a variable amount of liquid, resulting in a particular flavor. Braising relies on heat, time, and moisture to successfully break down tough connective tissue and collagens in meat. It is an ideal way to cook tougher cuts, such as chuck roast. Many classic braised dishes such as Coq au Vin are highly-evolved methods of cooking tough and unpalatable foods.

      - Deglazing-  is a cooking technique for removing and dissolving caramelized bits of food from a pan in order to make a flavorful pan sauce.


      FYI LINKS

      More on Swedish Cuisine
      Crockpot FAQ's
      More Swedish Recipes
      11 Tips for Slow Cooker Meals


      Monday, October 11, 2010

      Part 2 - Chicken Alfredo Pizza - Quick, Thick & Thin


      Introducing the Time-Saving variation of Chicken Alfredo Pizza Deluxe...


      Easy Express Chicken Alfredo Pizza 
        
      For those havoc-ridden weeknights, take advantage of ready-made ingredients. Heat your oven and your appetite. Put this scrumpdillyicious pizza on the table in the time it takes to finish a cup of coffee.


      INGREDIENTS


      • 1 store-bought pizza crust- recommended: Boboli
      •  Olive oil
      • 1-1/2 Cups premade garlic Alfredo sauce - recommended - Bertolli 
      • 1/2 tsp red-pepper flakes (more if you like spicy)
      • 1 Roma tomato, thinly sliced
      • 1 Cup rotisserie or leftover chicken, cubed or shredded
      • 1 Tbsp dried sweet basil, divided
      • Salt and black pepper
      • 2 Cups shredded mozzarella (low moisture)

      DIRECTIONS
       
         1. Preheat oven to 450° F.
         2. Brush crust with a light coating of olive oil then  spread the Alfredo sauce evenly to within 1/2-inch of
             rim. Sprinkle with red-pepper flakes. Evenly layer with tomato slices, the chicken, and half of the basil.
             Season to taste with salt and pepper. Top with shredded mozzarella and sprinkle with remaining basil.
         3.  Bake 10 minutes (or according to package directions). Cool slightly before serving.

      And there you have it.... a semi-homemade Alfredo pizza in less than 30.


      ---------------------------------------------------- 

      Wholesome Whole Wheat Chicken Alfredo Pizza 


      INGREDIENTS
      • 1 Wholewheat thin pizza crust (recipe follows) or 1 store-bought crust
      •  3/4 lb. boneless skinless chicken breast
      • 1 Tbsp olive oil or cooking spray
      • 2 Cloves garlic, minced
      • 2 Tbsp Reduced fat butter (recommended- Land O'Lakes)
      • 1 Tbsp flour
      • 1 Cup fat-free Half-and-half or 1% milk
      • 4 Tbsp Reduced-fat Parmesan Cheese (1/3 less fat)
      • 1 large Roma tomato, sliced thin
      • 1 Bunch (abt 11 leaves) fresh basil
      • 1 Cup Fat-free mozzarella cheese, shredded (more, if you're splurging)


      DIRECTIONS

      1.  Par bake crust in preheated 500° oven for 5 minutes. Remove from oven and set aside.

      2.  Spray a medium skillet with non-stick spray if using. Heat skillet over medium-high heat. Cook
          chicken breast for 5 minutes each side or until juices run clear. Remove chicken to cutting board and let
          rest.

      3.  Wipe out skillet with paper towel.  Over medium-low heat, melt the butter, add garlic and red-pepper

          flakes, and saute 3-4 minutes. Stir in the flour and cook until bubbly, 2-3 minutes more. Gradually

          whisk the half-and-half into the garlic mixture. Stirring constantly, cook 3-4 minutes or until sauce

          thickens. Stir in the Parmesan cheese and season with salt and pepper to taste. Remove from heat.

      4.  While sauce cools, shred or dice the prepared chicken. Slice the tomato. Slice the basil leaves into

          thin ribbons (called a chiffonade).

      5.  Spread the Alfredo sauce evenly over par baked crust. Top with the tomato slices, chicken, and half of

          basil. Sprinkle top with mozzarella cheese.

      6.  Bake at 375° F. for 25 minutes, or until golden and bubbly. Allow to cool 10 minutes before slicing.


      Whole Wheat Thin-Crust Pizza Dough
      Recipe compliments of and adapted from Kathleen Daelemans


      Ingredients
      • 1-1/4 cups whole wheat flour
      • 1/2 cup unbleached all-purpose flour
      • 1 pkg. dry active yeast
      • 1/2 tsp salt
      • 1/4 teaspoon sugar
      • 3/4 Cup lukewarm water
      • 1/4 teaspoon olive oil
      • Cornmeal for sprinkling 
      Directions
      Place flour, yeast, salt and sugar in a mixer fitted with a dough hook (although a regular hand-mixer will suffice, but only add half the flour and stir in the remaining flour by hand). While mixer is running, gradually add water and knead on low speed until dough is firm and smooth, about ten minutes. Turn machine off. If using a hand mixer, turn out dough onto a floured work surface and knead until smooth and elastic, about 5-6 minutes. (See Rusty Spoon link below for video instructions.)

      Pour oil down inside of bowl. Turn on low once more for 15 seconds to coat inside of bowl and all surfaces of dough with the oil. Cover bowl with plastic wrap. Let rise in warm spot until doubled in bulk, about two hours.

      Preheat your oven to highest setting, 500° or 550°F. If using a pizza stone, place stone in oven on bottom rack, preheat oven one hour ahead. Punch dough down, cut in half. (If making thin crust, which produces 2 pizzas, wrap half the dough in plastic wrap and freeze for later use.) On generously floured work surface, place one half of dough.

      By hand, form dough loosely into a ball, stretch into a circle. Using a floured rolling pin, roll dough into large circle until very thin. Don't worry if your circle isn't perfect and if you get a hole; just pinch edges back together.

      To prevent dough from sticking to counter, turn dough over, add flour to dough, counter and rolling pin as needed. Sprinkle pizza peel or cookie sheet generously with cornmeal. Transfer dough to pizza peel , pizza pan or cookie sheet with no rim.

      Slide dough onto pizza stone or place cookie sheet with pizza on bottom rack. Par bake 5 minutes. Add toppings and bake as directed.


      Yield- 1 Thick Crust or 2 Thin Crusts


      Do-Ahead Tip: Make dough ahead of time and refrigerate for up to 3 days or freeze for up to 9 months in securely wrapped plastic/freezer bag. Thaw completely and bring to room temperature before rolling out.


        Sunday, October 10, 2010

        Glazed Carrots


        We interrupt this program to post the following veggie recipe. Quick, Thick & Thin Chicken Alfredo Pizza, Part II will continue, as promised, tomorrow.

        A respite from the ooey-gooey cheesy decadence in favor of a non-taxing veggie dish. Carrots. But not just any carrots. Glazed carrots. Make it as a side to compliment just about any entree imaginable. Simple. Nutritious. Delicious. Straight from the cornucopia of my garden. Well, somebody's garden anyway....

        GLAZED CARROTS

        Glazed Carrots are perfect for those slightly bitter bunches that we all come across now and then...

        • 1 lb baby carrots
        • 1 Tbsp butter (or reduced fat butter)
        • 2 tsp water
        • 1 Tbsp light brown sugar
        • Dash of salt and freshly ground black pepper
        • 1 tsp dried parsley

        1. Place carrots in a medium size saucepan and just cover with water. Add 1/2 tablespoon of salt to the cooking water. Bring to a boil, reduce heat slightly and cook until carrots are tender-crisp, about 8-10 minutes.
        2. Drain cooking water and place carrots in a bowl. To same saucepan, add the butter and melt over low heat. Add the 2 teaspoons of water and the brown sugar and, stirring frequently, cook until combined, 2-4 minutes. Season with a dash of salt and a generous amount of black pepper. Add carrots and toss to coat.
        3. Transfer carrots to serving bowl and garnish with the parsley. Serve hot.


         Tips on Storage, Preparation and Nutrition

          
        • When selecting, look for firm carrots with orange (i.e., not green) tops.
        • To increase shelf-life, snip off the tops, place in a plastic bag and store in your vegetable crisper
        • Have leg cramps? Eat a bowlful of carrots! One cup of this orange wonder packs a whopping 410mg of  potassium, a mineral usually lacking in those who suffer from muscle cramps
        • Carrots are high in anti-oxidants which help in healthy cell reproduction
        • Carrots are high in vitamin A, necessary for healthy eyesight
        • Carrots are high in B-complex vitamins (did you know that? I didn't) which helps to combat depression and low energy levels-- and who doesn't need a natural energy boost?
        • When possible, serve carrots raw to retain all of their inherent health benefits and vitamins.

        LINKS

        Nutritional Information


        Friday, October 8, 2010

        Chicken Alfredo Pizza- Quick, Thick & Thin


        So here it is, my faithful readers. A gastronomical wonder. The ultimate white pizza. Take a break from the predicable and give this creamy, cheesy  pie a try.  You won't be disappointed.

        1 Dish, 3 Ways. Today, Variation One...

        Decadent Chicken Alfredo Pizza


        • 1 pizza crust, par baked (recipe follows)
        • 1 (3/4 lb.) boneless skinless chicken breast
        • Salt and pepper
        • 2 Tbsp olive oil + more for drizzling
        • 2 large cloves garlic, minced
        • 2 Tbsp butter
        • 1/2 tsp red pepper flakes (more if you like it hot)
        • 1 heaping Tbsp all purpose flour
        • 1 C. half-and-half
        • 5 Tbsp grated Parmesan cheese
        • 1 large Roma tomato, thinly sliced
        • 1 handful fresh basil leaves (about 11 large leaves)
        • 1 C mozzarella cheese, shredded
        • 1 C shredded Italian blend cheese (asiago, Parmesan, mozzarella, Romano, provolone, fontina combo)

        1.  Par bake crust in preheated 500° oven for 5 minutes. Remove from oven and set aside.
        2. Meanwhile, heat oil in a medium-size skillet. Season the chicken breast with salt and pepper and add to skillet. Cook approximately 5 minutes each side or until juices run clear. Remove chicken to cutting board and let rest.  

        To retain juices, let the chicken rest!


             3.  In same skillet over medium-low heat, melt butter. Add minced garlic and the red-pepper flakes.
                  Cook 3-4 minutes, stirring occasionally. Add the flour and stir to combine, cooking an additional
                  2-3 minutes or until bubbly. Slowly whisk the half-and-half into the garlic mixture. Stirring constantly,
                  simmer until sauce thickens, about 4-5 minutes. Stir in the Parmesan cheese. Season with salt &
                  pepper to taste.  Remove from heat and cool slightly.


        Equal parts butter & flour make A ROUX. 
        Whisk in milk & Parmesan for a delectable Alfredo sauce.


            4.   As sauce cools, cut the (rested) chicken into 1-inch cubes. Using a sharp knife, slice tomatoes thinly.  
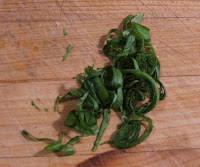
                  Stack the basil leaves, roll tightly, and cut across the roll to create a chiffonade (a French term 
                  which, translated, means "made from rags." See! We just learned a new culinary technique.    
                 
        Fresh Sweet Basil
            5.  Pour the cooled Alfredo sauce onto the par-baked pizza crust and spread to edges. Layer with the
               tomatoes, the basil (reserve a bit for garnish) and the diced chicken. Top with the shredded mozzarella
               and/or shredded Italian blend cheeses. Garnish with remaining basil.

        Layer sauce, tomatoes, basil and chicken. Preheat oven to 375°

           6.   Drizzle the pizza with olive oil. Bake at 375° for 25 minutes or until light golden brown and cheese is
                 bubbly. Cool 10 minutes before cutting into slices.  

        Yield-  One Large Pizza


        ------------------------------------------

         So pizza crust. Never made your own? Don't be intimidated. If you're like me, you envision a flour-doused housewife in Victorian skirts sweating over a lump of dough that fails to rise.... Today's packaged yeast is refined and home-cook friendly. Ya gotta try it. At least once.

        The Ultimate Thin-Crust Pizza Dough
        Adapted from a recipe by, and my thanks to, Tyler Florence
        • 1 pkg. active dry yeast
        • 1 tsp sugar
        • 1 C warm water
        • 1 Tbsp Kosher salt (2 tsp table salt)
        • 2 Tbsp olive oil + more for brushing
        • 3 C flour 
        • a sprinkle of cornmeal 
           1.   Combine yeast, warm water and sugar in a large mixing bowl and let stand until foamy, about 5-10
                  minutes (this means the yeast is alive; it's alive!)

           2.   Add salt and oil to the yeast mixture. With electric mixer on low, add a little flour at a time and mix as
                 much flour in as is possible to handle with the mixer. By hand, stir in remaining flour. When dough
                 begins  to leave the sides of bowl, turn out onto a lightly floured work surface. (If dough is too crumbly
                 add a little more water; if too sticky, add a bit more flour.) Knead dough until smooth and elastic. Form
                 dough into a round ball and place in oiled bowl. Turn dough over so oiled on all sides. Cover; Let
                 rise in warm, draft-free place until dough doubles in size, about 1 hour.
               
            3.   Preheat oven to 500°. Punch down dough and roll into a cylinder. Divide into 3 equal pieces. Cover
                  let rest 10 minutes (this tames the dough, making it easier to work with). 
                  Note: now is a great time to wrap and freeze dough for later use. Wrap in plastic wrap and store
                  in airtight freezer bag for up to 9 months.

             4.   On floured surface, roll or pat out dough into desired shape.

        Roll out pizza dough from middle to edges
            5.   Sprinkle cornmeal onto pizza pan, about 1 tablespoonful. (I'll save the pizza stone method for another
                  day.) Carefully transfer the dough round to the pan. With a pastry brush, spread a thin layer of olive    
                  oil over dough. With a fork, generously prick holes into the dough (this will prevent shrinking and
                  bubbling). 
        Please be generous with the pricking!


             6.   Par bake (see term below) for 5 minutes (4 mins. if your oven is cranky like mine). Remove from
                   oven and let cool. Your crust is now ready for toppings. Pat yourself on the back. You did it!

         Yield- 3 pizza crusts


        FYI Links


        *Tip of the Day* 
        A warm cocoon for your rising dough: set oven to lowest temperature for 5 minutes. Switch off heat and place covered dough on oven rack to let rise. If your unit has a light, turn it on. The warmth from the bulb will encourage rising. 


        Tomorrow, the Express & Heartwise Variations. Until then, Bon appétit !


            Tuesday, October 5, 2010

            New England Clam Chowder - Express & Heart-Wise Versions

            Perfect for busy moms and dads, weeknight meals, and the cook on a shoestring budget. The Express recipe is a quicker, budget-friendly alternative to the "decadent" version posted previously. Gathering all of your ingredients and equipment before starting, this dish, from start to finish, typically takes 30 minutes or less to prepare.


            New England Clam Chowder Express


              • 5 Tbsp butter
              • 2 Cups chopped (fresh or frozen) onions
              • 1 Tbsp minced garlic (fresh or jarred)
              • 2 Cups chicken stock
              • Diced potatoes - 2 (10 oz) cans drained - OR- 1 (16 oz) bag frozen
              • 2 (6.5 oz.) cans chopped clams in juice, juice reserved
              • 2 bay leaves
              • 4 Cups whole milk
              • 4 Tbsp all purpose flour
              • 1 Tbsp sugar (or to taste)
              • Salt & black pepper, to taste
              • 1 Tbsp dried parsley

            1.  In large pot over medium heat, melt butter. Add onions and saute until golden and translucent, about 10 minutes. Add the garlic and cook 2 minutes more. Add the chicken stock, potatoes, clams and juice, bay leaves, and heat until just boiling. 
            2. Meanwhile, in large bowl, whisk together the milk, flour, and sugar until combined. Add to stock   mixture. Bring to a boil and cook 5 minutes or until chowder has thickened and (frozen) potatoes are completely warmed through. Remove bay leaves. Season with salt and pepper. Garnish with parsley. Serve with a nice crusty bread or oyster crackers.

            Soups on! 

             ----------------------------------------------------------------------------------------

               
            And Last but Not Least...


                    New England Clam Chowder - Wholesome & Heart-Wise

            A few minor alterations can make a major difference in calorie count, sodium intake and fat content without sacrificing flavor.
                      
              •  3 Tbsp olive oil - OR- 1/3 Cup Low Sodium chicken broth
              • 2 medium onions, chopped
              • 1 Tbsp garlic, minced
              • 4 medium potatoes, peeled, diced into bite-size pieces
              • 2 Cups Reduced-Sodium Fat-Free chicken stock
              • 2 bay leaves
              • 2 (6.5 oz.) cans chopped clams, drained
              • 4 Cups Fat Free half-and-half (or low-fat milk, if you must)
              • 4 Tbsp all purpose flour
              • 1 Tbsp honey
              • 2 Tbsp fresh parsley, chopped
              • 2 Tbsp fresh chives, chopped
            1. Heat olive oil in a large pot (if using) over medium heat. Add onions and cook until golden and translucent, about 5-10 minutes. If using chicken stock, heat the stock in a large pot. Add the onions and cook until soft. Add the garlic and cook 2 minutes more. Add the chicken stock, potatoes and bay leaves. Bring to a boil, reduce heat, and cook, uncovered, until potatoes are just fork tender, about 10 minutes.
            2. Pour the fat-free half-and-half into a large bowl and whisk in the flour and honey until incorporated. Add the half-and-half mixture to the potatoes and stock. Add the chopped clams and stir to combine. Bring to a full boil, stirring constantly. Gently boil  for 3-5 minutes or until chowder thickens. Season with salt and pepper to taste. Remove bay leaves before serving. Garnish with chopped parsley and chives.

            NOTES on NUTRITION & PREPARATION 

             Okay, so the chowder may fall between the cracks of wholesome and heart-wise. I didn't say "healthy" did I? Just healthier. Take a look:


            Olive Oil or Broth for Sauteing
            Using chicken broth will save you 11.29g of fat and approximately 108 calories. However, if you are on a reduced sodium diet, you may want to opt for cooking the onions in olive oil which contains 0mg sodium. Yes olive oil contains fat, but it's the healthful fat! The bottom line is, use olive oil if you want to reduce cholesterol and sodium. To eliminate calories and fat, use the stock.

            Substituting Low Sodium Chicken Stock will save you a whopping 419mg on your salt intake.

            Fat-Free Half-and-Half  contains 0g fat and 0 cholesterol. Keep in mind though that the fat-free version compared with regular half-and-half contains increased sodium (24mg versus 6mg) and, surprisingly, the calorie count is identical. Choose accordingly.


            Nutrition Fact Links

             Canned Clams

            Fat Free half-and-half

            Low Sodium Chicken Broth

            Incredible Benefits of Honey


            Comments and suggestions for improvement are more than welcome!